
Disclosure: At the end of this efficient home server article I use amazon affiliate links. They don’t cost you anything, but help me offset some of the cost for running this page. For details, check the affiliate disclosure.
If you’re like me, you want to be able to access all your digital life from anywhere. But, you also don’t want to put your personal documents and data on third party servers. Yes, the security of Google’s data centers against unauthorized access might be a lot better than that of my home server. Yet, if the guard is the one reading my data it kind of defeats the purpose. So, having an efficient home server to host all my services would be ideal.
There’s tons of services you might like to run yourself. Some of them might be:
- Network attached storage
- Home automation
- Password manager
- Calendar(s)
- Private messenger
- and lots and lots more
People certainly often use old hardware for machines to run these services. I’m not too big of a fan of this, since old hardware usually is slow and consumes a lot of power. Especially here in Germany, where electricity is still comparatively pricey. I’d like to keep the power consumption down, hence the efficient home server. Usually, I indeed do recycle hardware as good as possible. But for my new NAS/HomeServer I wanted to invest in new hardware. Mostly because I did not have any hardware lying around for this project. Let’s build an efficient low power home server together 😊
In this 4 part article series I’d like to show you how I chose the components for the efficient home server and certainly what the resulting system is like. The resulting efficient home server in my case does need far below 10 W during idle and yet is more than fast enough to run multiple VMs and containers.
In Part 1 I explain what hardware I have chosen, why and how I chose it. The Part 2 documents the actual build process and power optimizations. The power optimizations are detailed in this Part 3 (this part). The last and 4th part explains the main pitfalls I experienced when configuring all the services I wanted.
If you haven’t read Part 1 and Part 2 of this efficient home server series, go check it out now, since it also includes details on how I selected the components and how I got here.
Contents
Power usage and optimization
As mentioned previously, one main goal of this build was to keep the power usage of the “bare system” below 10 W. In Part 1 of this series, I’ve defined this as basically the whole system, but without the hdds: Mainboard, CPU, memory and ssd. Since it is the easiest ald likely also the most accessible method, I’ve measured the power usage from the wall. This means, the PSU is also included.
How did I measure?
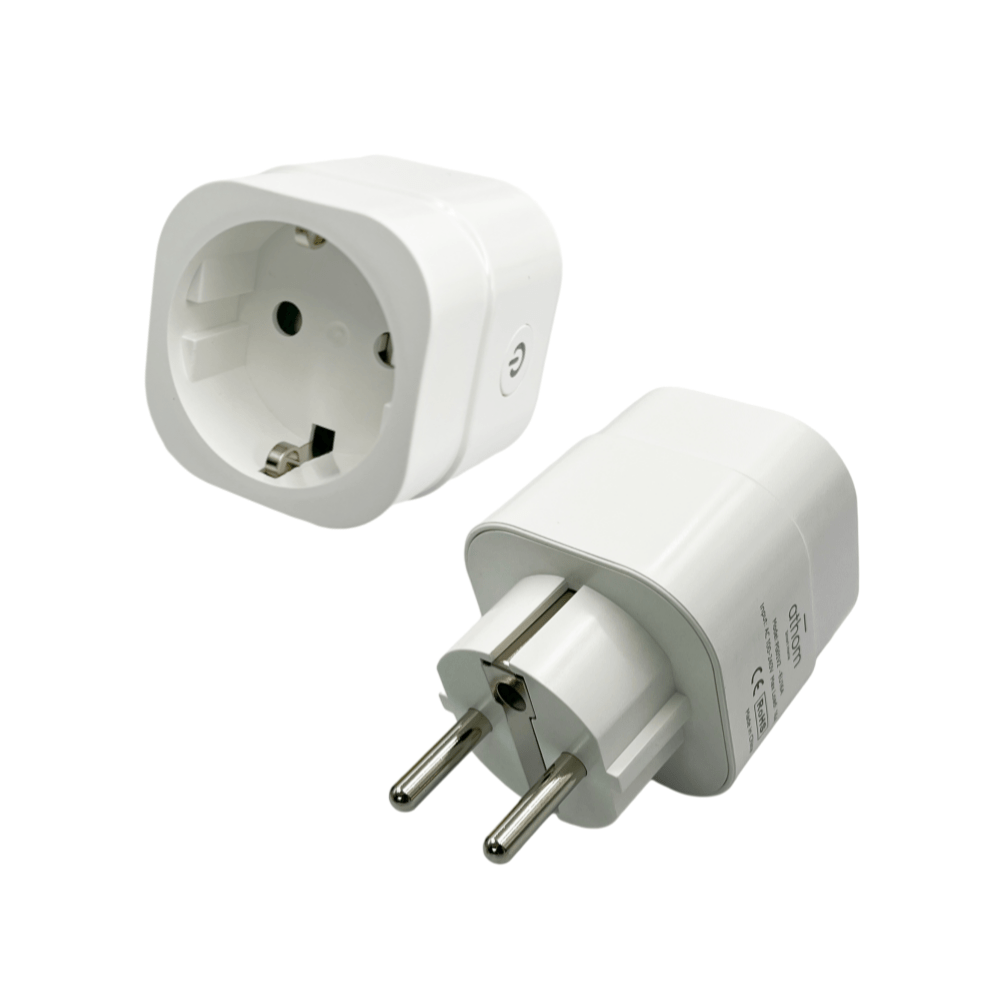
So, how did I actually measure? Since I had them at hand, I’ve used the pretty affordable ATHOM Tasmota EU Plug V2. The nice thing about these plugs certainly is that it uses Tasmota as firmware. Hence, calibration is no problem and can be done quite easily. There is a V3 now, which uses a better micro-controller, but otherwise they seem to be the same. Furthermore, to make sure my power plug does measure correctly, I’ve made sure to calibrate it.
Calibrating the Tasmota power plug
During the calibration I’ve used two calibrated bench top Fluke 8846 6.5 Digit Precision Multimeters as reference devices . The calibration of the reference devices was previously done by a certified, independent calibration laboratory. Starting with an purely ohmic load, I’ve measured the current and the voltage at the same time (hence the two devices) and calculated the consumed power from this. Strictly speaking, this still does not calibrate the measurement of the phase angle, but for my needs this was enough.
Once I’ve connected the load and powered it on, it was just a matter of reading the voltage and the current from the reference devices and telling the power plug the correct values. To enter the values, firstly load the plug’s webui in a browser and open the console. Setting the voltage and the current can be done with the following two commands:
VoltageSet <VoltageValue>
CurrentSet <CurrentValue>
To clarify, for the shown commands, the voltage value has to be given in Volts, the current in Amperes and for both values as decimal separator a “.” must be used.
Out of the box
After making sure the displayed values are correct and I’ve assembled my new efficient home server, I indeed wanted to know how efficient it actually would be “out of the box”. At this stage, I still hadn’t connected the hdds and a display was connected for all measurements. According to the measurements I have done, disconnecting the display did not make a difference.
After turning the machine on, loading the power optimized defaults and installing TrueNAS SCALE, the machine sat at around 14 W during idle. Ok, that was disappointing. But why? From my research the system should be able to go well below 10 W, and I still was conviced that it was!
BIOS settings
Firstly I started looking around the BIOS, there were a few things that might impact on the power usage:
- CPU speed
- Load-line calibration
- Memory speed
- Active peripherals
- ASPM mode
Clock frequencies
The CPU speed isn’t really something I want to touch. Reducing the CPU’s nominal clockspeed will not affect the idle power of the CPU. Any modern CPU will reduce its clock frequecy significantly during idle. So capping the CPU’s nominal clockspeed will only limit the maximum frequency during load phases. Only doesn’t it help at all, it’ll even make the CPU slower in when you really need that number crunching power.
The same logic also does apply to reducing the memory speed. You essentially cap the maximum memory speed, which doesn’t affect the memory frequency at idle.
Load-line calibration
Load-line calibration (LLC) is a bit complicated. The aim of the load-line calibration is to minimize the CPU’s core voltage. Lower core voltage usually means lower losses, which consequently means lower power usage. But, lowering the voltage below a certain threshold makes it run unstable or stop working alltogether. The load-line calibration thus aims to find the minimum safe voltage your CPU runs at. Here’s where it starts to get complicated: depending on the CPU’s clock frequency, the minimum safe voltage is different. Additionally, there is an unknown and current dependent supply line voltage drop. So the supply voltage does not neccessarily is equal to the voltage that’s actually applied to the CPU’s core.
Due to the complexity and the multitude of possibilities and variables that it depends on, the tuning the LLC is quite time consuming. Even if you think you’ve found good settings, you have to verify them long term. Additionally, every CPU is a bit different due to manufacturing tolerances. So the LLC must be done individually for each and every CPU.
TL;DR: I’ve tried a few settings, but I wasn’t able to find settings that significantly lowered the power usage of the machine at idle. Additionally, since I want the maximum possible stability for the system, I decided to opt out of LLC for this build.
Peripherals
The BIOS also allows to enable or disable certain peripherals, which in the case of the ASUS ROG Strix B760-I Gaming mainboard are mainly:
- USB controller
- Audio
- Ethernet
- WiFi
- LEDs
USB & Audio
Surprisingly, disabling the USB controller did not make much of a difference for me. Furthermore, I want to use an external USB drive as backup drive to periodically backup the NAS’ data. So I kept it on.
Unless you’re using your NAS as media server, too, I think you can safely disable audio in the BIOS. To be honest, from what I’ve measured the gain wasn’t really measurable…
Network
For a NAS it’s likely that you’re going to use some sort of network connection, likely the ethernet connection. If you still want to save a bit of energy, you can reduce the ethernet port’s speed to 100 MBit/s instead of the nominal 2,5 GBit/s. Keep in mind that this will drastically reduce the speed at which you can read and write the data from or to your NAS, respectively. If you’re infrastructure is 100 MBit/s only, this definitely is an option. Otherwise, keep it at 2,5 GBit/s. With proper OS-side power management the difference was less than 1 W. Disabling ethernet alltogether lowered the power consumition around another 1 W.
Chances are, if you keep on the wired ethernet, you don’t need the WiFi. Disable it to gain another 1 W.
LEDs
The last peripheral you could adjust are the LEDs. In my setup this affects the mainboard status indicator LED, the power LED on the front panel and the hdd access LED. Should you have those fancy LED fans in your case, those would be affected, too. For my setup with only those few LEDs I didn’t notice a difference in power consupmtion when disabling them. So I kept them on all time.
ASPM mode
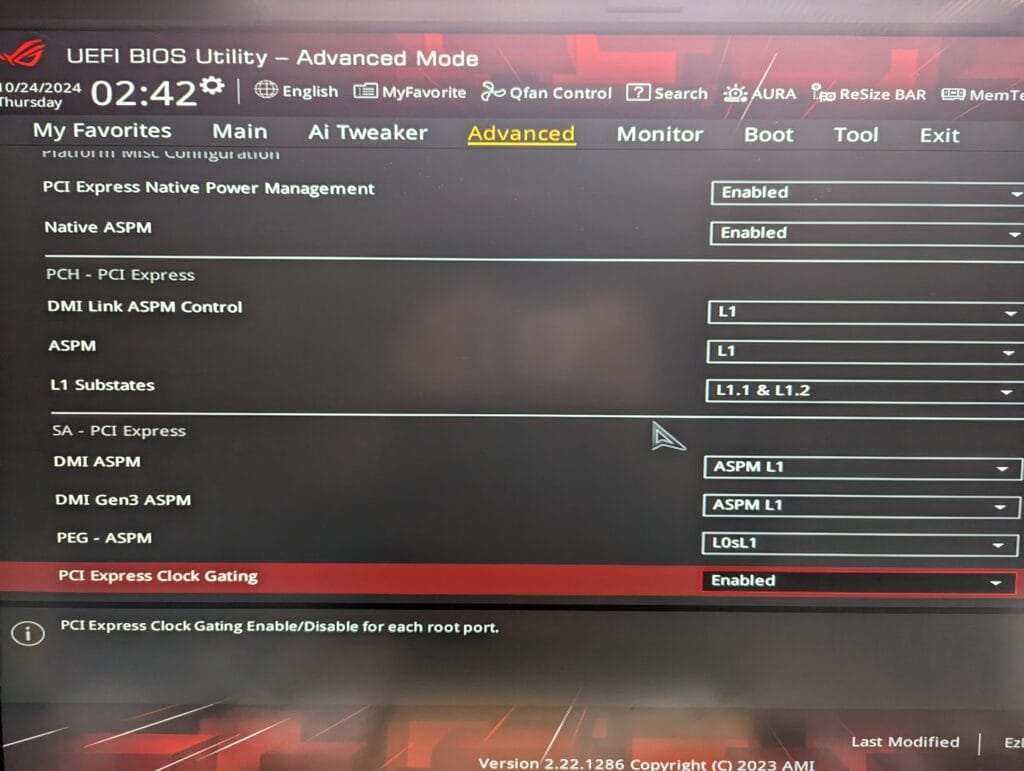
Another interesting setting to look into is the Active State Power Management (ASPM). ASPM is the power management for the PCIe devices inside the machine. For this machine basically everything is connected to the CPU through PCIe: the USB host controller, the PCIe slots, the m.2 slots, the SATA ports, the Wifi card, almost everything. In the BIOS you can choose to enable or disable the native ASPM. If native ASPM is enabled, your BIOS will handle the power management. You want this to be set to disabled, so the OS can handle the power management.
Should you ever reset your BIOS settings to the optimized default, make sure to disable native ASPM again, because it is enabled per default! If you’ve got the ASUS ROG Strix B760-I Gaming mainboard, you likely have to enable it manually by Entering the BIOS.
Change “Advanced Mode -> Advanced -> Platform misc configuration -> Native ASPM” to “Enabled”. If you forget to do this, you will likely be stuck at around 14 W, even with the powertop procedure and ASPM mode described later.
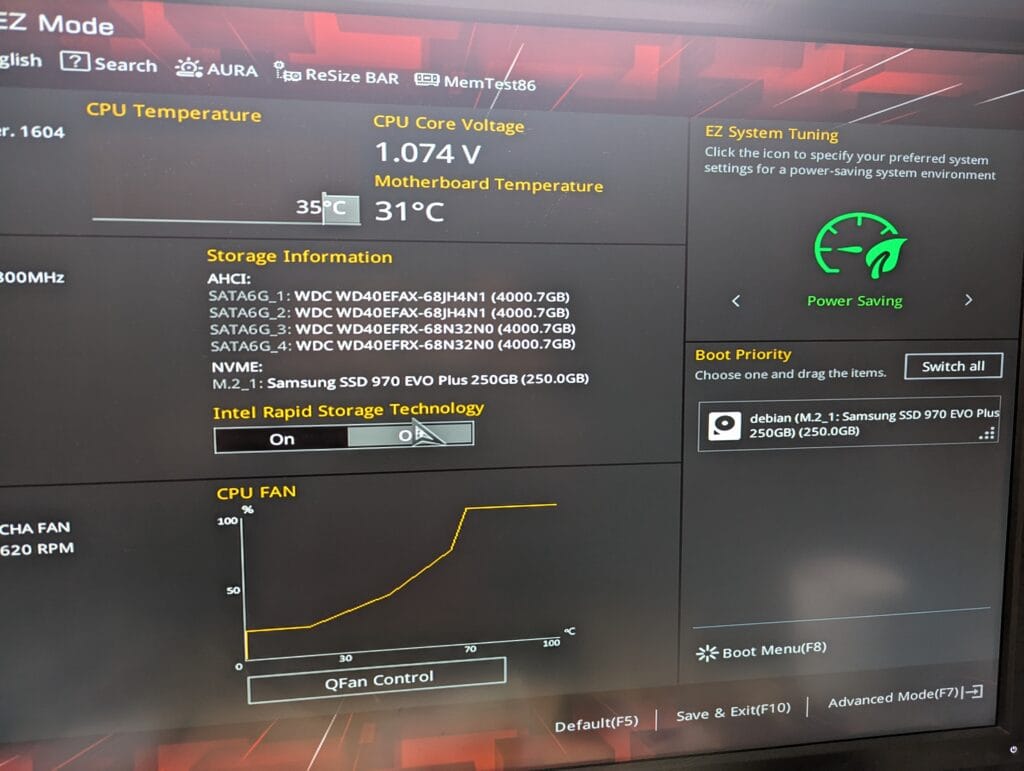
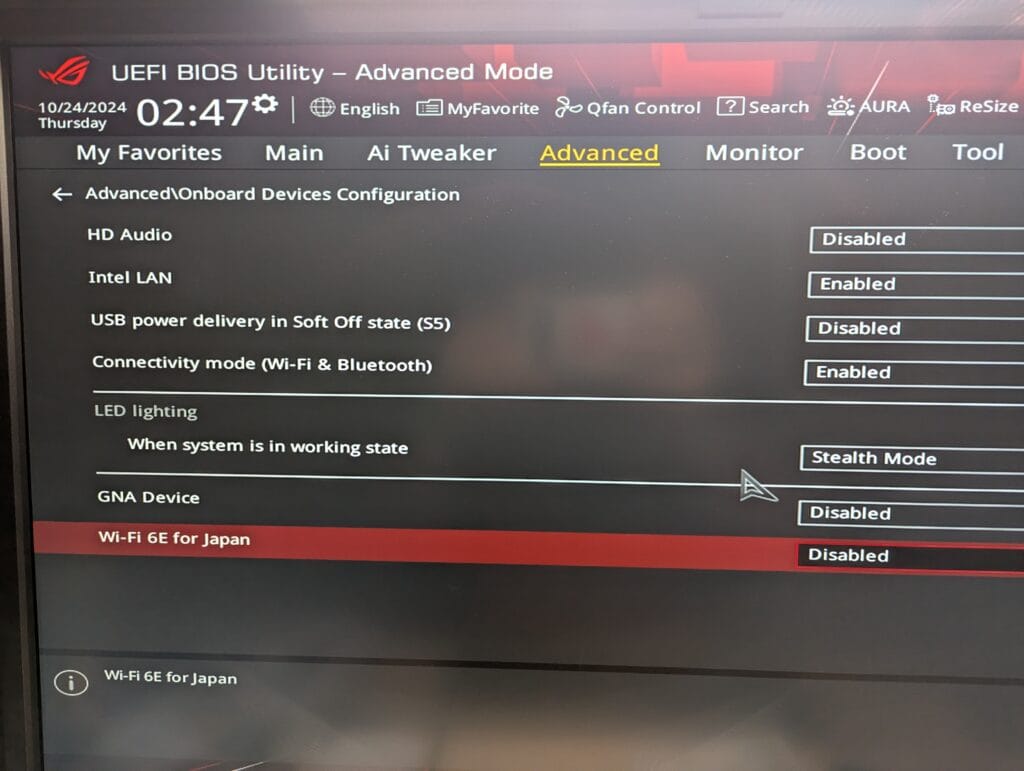
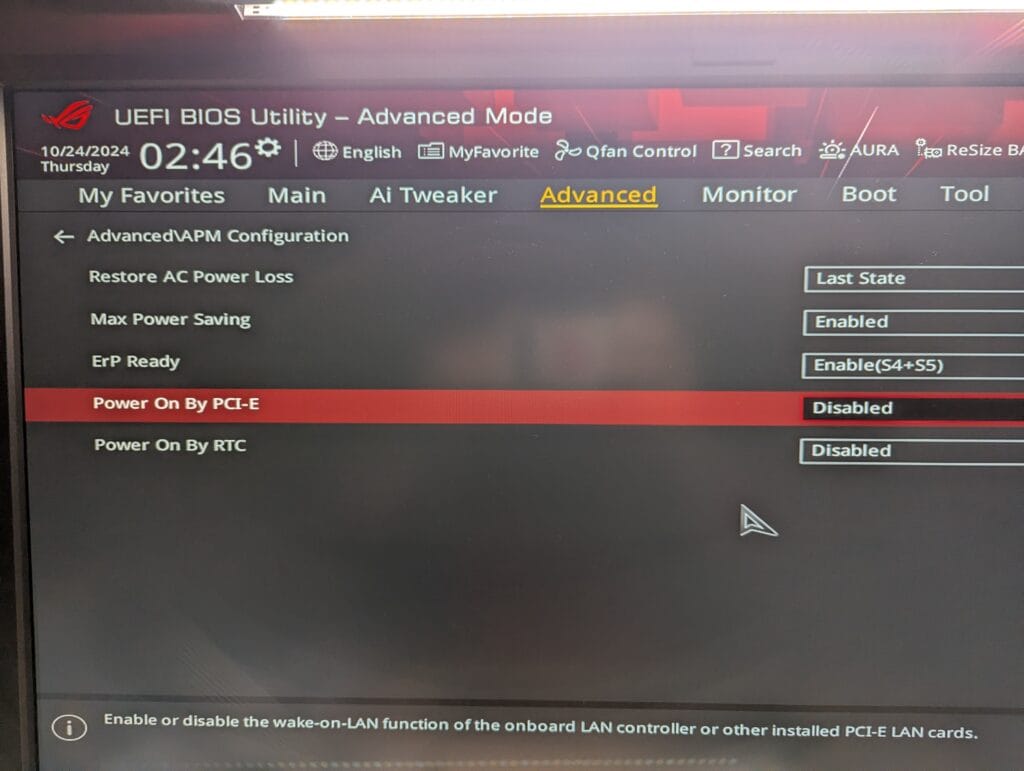
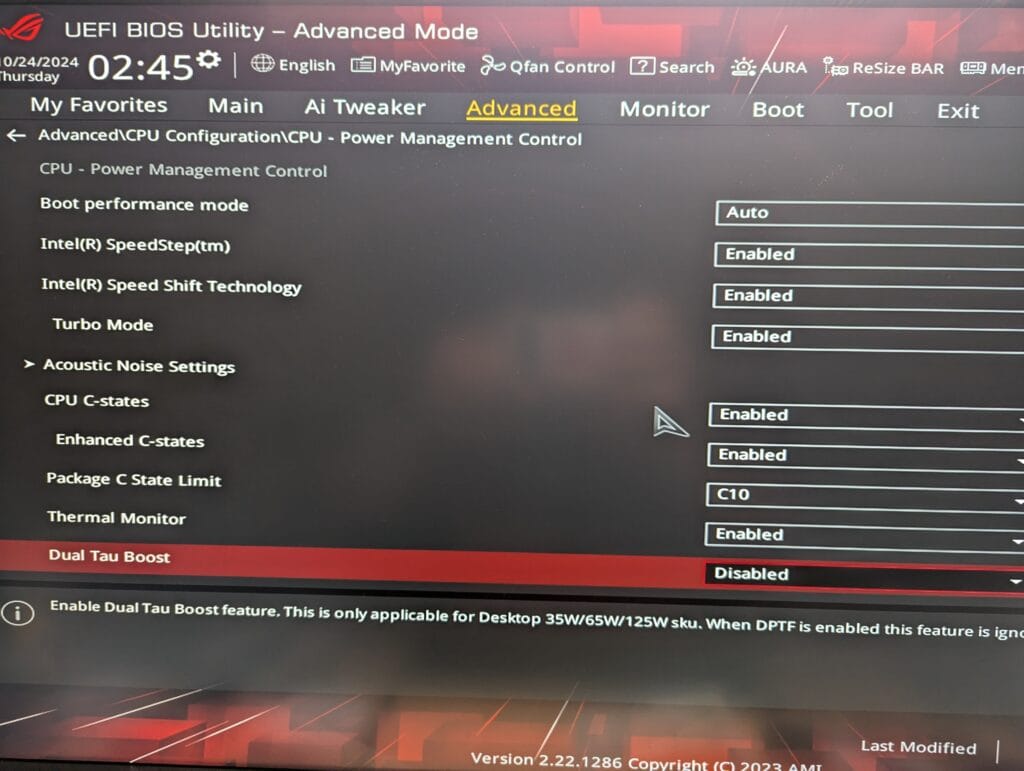
UPDATE on 27th October 2024: Additionally, here are “screenshots” of all relevant BIOS-Setting screens. It is important to use the “Power Saving” preset (top left in “EZ Mode”. Sorry for the rather poor image quality.
OS adjustments
The OS I’m using for this machine in TrueNAS SCALE, but everything I do should work with any modern Linux distribution. To optimize the power usage from the OS side, these three things had the biggest impact for me:
- Disk idle
- Powertop
- ASPM mode
Update on 27th October 2024: All OS related power measurements have been done using TrueNAS SCALE. TrueNAS SCALE is based on debian, which today is pretty good at power management. Unraid on the other hand is based on Slackware Linux, which seems to do a lot of power management related things differently. From my experience, running the exact same settings with unraid, the system will have a considerably higher power consumption. ASPM seems to be active, but in unraid I have no way to change the ASPM mode, which results in higher power consumption. For the time being, all the described power consumption values are not attainable with unraid. You’re welcome to comment or drop me a line if you were able to get below 10 W with unraid!
Disk idle
It is a very controversial topic, and at this stage I still did not have any hdds in my system, but I do want to talk about disk spindown. The disks I added later (Western Digital Red 4 TB, WD40EFAX, amazon link at the end) use around 5-6 Watt while spinning. During spindown the power usage goes down to around 0,5 W.
Some people will tell you that when using spindown your disks will be worn within a few weeks, other people will tell you to definitely spin down the disks as often as possible. I personally am somewhat in between, but I usually enable disk spindown.
I’ve set my spindown time to 5 minutes for all hdds, since from my past experience that suits my usage pretty well.
A word on the hdds I’m using: the disks I’m using use shingled magnetic recording (SMR), which isn’t really the best thing for NAS usage. For me personally it’s ok, since the throughput on my disks isn’t that high and I got the drives cheap. Today I’d rather buy a WD Red Plus 4 TB (WD40EFZX for 128 MB cache, WD40EFPX for 256 MB, both amazon links below), since it uses CMR and the price is in the same ballpark.
A short rant on disk reliability
The disks I’ll be using are rated for 600.000 load/unload (spinup/spindown) cycles. With an extremely poorly adjusted setting, you’ll set a spindown time of around 5 minutes. But, your access pattern basically wakes it as soon as the disk spun down. That’ll make roughly 12 spinups per hour or 96 per work day (8 h) or 288 if you keep doing it all day. Keep in mind that the 600.000 load/unload cycles is on average and under ambient conditions (usually 20°C).
That means, with these very poor settings your disk will on average still work for more than 5,5 years (288 cycles a day) or 17 years (96 cycles per day) at ambient. I sure hope you do not use your NAS disks for 17 years… Yes, your disks will not be operated at ambient temperature, the temperature inside your case will likely be a bit higher than that, but still. Should the average cycle count at those conditions be around 100.000, you’ll still get around 1 year (288 cycles a day) or 3 years (96 cycles a day).
Now, if you’ve adjusted your spindown to your usage, you’l likely be around 20 or 30 cycles per 24 h, I usually have less. With that in mind, even with only 100.000 permissible cycles on average, your disk should still last you more than 9 years. Way longer than you’ll likely be using it anyways. Keep in mind that besides spinup/spindown there still is other wear and tear on your disks.
Regularily changing the disks
The number of operating hours of the disk bearings for example isn’t infinite either. To force myself to regularly upgrade the hdds, I don’t buy the biggest size available, but only one or two sizes bigger than what I just have. For example my last hdds had a capacity of 2 TB. When I came close the filling the drives, I bought new 4 TB drives and replaces the old ones. Like this I’ve made sure to force myself to replace the disks in regular intervals.
Powertop
Powertop is a console based tool that lets you see and explore the power management settings of your system, a “top” for power management if you will. It will show you details about the power management of your CPU (C-states, ratios of the C-states, load information etc.) and the rest of your system. You can also change and experiment with a few settings if you want to. Be assured that you can’t really break anything, all changes are non-permanent and gone if you reboot.
Instead of changing all settings manually, powertop also offers an automatic mode. That’s the one we want to use:
powertop --auto-tuneMind that you need to execute the above code as root. That should bring down your power usage considerably. Minor inconveniences like small lags on your first key press after a while without a key press are absolutely tolerable for a NAS without a keyboard and screen. See for yourself if you can live with these settings. If you want to make the settings permanent, check the XXTZFDGWGFDKJ section.
ASPM mode
Last we want to set the kernel’s ASPM mode. This is done through sysfs, which is a virtual file system that let’s you change ther linux kernel’s parameters at runtime. Sounds complicated, but its super easy.
The kernel’s behaviour regarding the PCIe ASPM is handled in “/sys/module/pcie_aspm/parameters“. Inside is a file called “policy“, which reflects the current power management policy for pcie_aspm. To find out the current setting, simply print the “file’s” contents:
cat /sys/module/pcie_aspm/parameters/policythis will print something like
[default] performance powersave superpowersaveThe words are the modes the kernel knows. The mode with the square brackets (default in this case) is the current mode. Changing the mode is as easy:
echo "powersave" > /sys/module/pcie_aspm/parameters/policyExecuting the above command as root should change the mode to “powersave”. To check if the mode has successfully been changed, run the first cat command again. It should now say something like
default performance [powersave] superpowersaveAgain, you can’t break much here, settings are only valid until you reboot.
Should you get an error that you don’t have permission to edit the file, there’s two possible solutions that I know of:
- Make sure you’re running the command as root. Only certain users have access to the sysfs, one of them is root
- You likely have native ASPM enabled in the BIOS, so the OS is not allowed to handle ASPM. Therefore the kernel does not allow you to change the mode, since it cannot control it.
Making settings permanent
Should you have found settings that suit you, you usually would want to make the settings permanent. At this point, the settings would be gone after a reboot and you’d have to apply them after every boot. The easiest way would be to let cron execute the commands after each boot.
crontab -eBy For the very simple case that you want to keep the automatic settings of powertop plus “powersave” mode for pcie_aspm, add this line to the end of the root user’s crontab:
@reboot powertop --auto-tune; echo "powersave" > /sys/module/pcie_aspm/parameters/policy If you don’t want to do that manually or don’t want to use cron, go check out my TrueNAS SCALE helper script (TNSH). It can automatically do all that fo your and a lot more. Usage is pretty easy, “installation” instructions are in the github, but let me run you through it shortly.
The script is designed for use with a modified TrueNAS SCALE installation, but it will also work on standard installations, just keep an eye on the instructions and notes the script will give you. To install the script, you simply run
curl -O https://raw.githubusercontent.com/kage-chan/HomeLab/main/TNSH/TNSH.sh
chmod +x TNSH.sh
sudo ./TNSH.sh
This will download and run the script, presenting you with the main menu. Just press 1 (for power optimization) and y to make the changes permanent.
Comparison of power usage
Just to have a better overview, I’ve collected some usage values for my NAS and keep them organized in this table. I’ll keep them updated over time.
| Description | Power usage |
|---|---|
| Out of the box (GbE enabled, WiFi disabled, 1 m.2 ssd, no hdds) | 16 W |
| – GbE disabled | 14 W |
| Optimized (BIOS Power-optimized defaults, WiFi disabled, powertop auto-tune and pcie_asmp in powersave mode, ASPM handled by OS (this bit is important!)) | 6,4 W |
| – WiFi enabled | 7,5 W |
| + 2 hdd (spun down) | 11 W |
| + docker (running pihole and Nextcloud AIO) | 16 W |
Conclusion
That concludes Part 3 of the efficient home server build, the power usage. As I have shown, my original goal of building a sub 10 W NAS was pretty successful. Even with the machine running a few containers and having a few disks inside keeps the power usage in an absolutely acceptable range. I still haven’t moved my HAOS VM, but likely that’ll add another few Watts, but I’ll keep the values updated as I go.
In Part 4 of the efficient home server series I’ll show you how I’ve set up my TrueNAS SCALE and why and how I’m using docker instead of the default k3s kubernetes.
If you haven’t read Part 1 and Part 2 of this efficient home server series, go check it out now, since it also includes details on how I selected the components and how I got here.
Amazon Links
If you enjoyed the article and would like to say thank you (or build the same system), please consider using one of the Amazon affiliate links from the table below. At this point I still have to manually handle the Amazon Affiliate links, so please choose the location closest to you from the table. As amazon associate I am getting a small share if you buy the products clicking on the links. Thank you 😊
Disclosure: The links below are all Amazon Affiliate links. For details, please check my affiliate disclosure.
Note: I wasn’t able to find a UK smart plug with Tasmota on Amazon UK. Consider using an EU-Plug with an UK-adapter.