
Disclosure: At the end of each efficient home server article I use amazon affiliate links. They don’t cost you anything, but help me offset some of the cost for running this page. For details, check the affiliate disclosure.
If you’re like me, you want to be able to access all your digital life from anywhere. But, you also don’t want to put your personal documents and data on third party servers. Yes, the security of Google’s data centers against unauthorized access might be a lot better than that of my home server. Yet, if the guard is the one reading my data it kind of defeats the purpose. So, having an efficient home server to host all my services would be ideal.
There’s tons of services you might like to run yourself. Some of them might be:
- Network attached storage
- Home automation
- Password manager
- Calendar(s)
- Private messenger
- and lots and lots more
People certainly often use old hardware for machines to run these services. I’m not too big of a fan of this, since old hardware usually is slow and consumes a lot of power. Especially here in Germany, where electricity is still comparatively pricey. I’d like to keep the power consumption down, hence the efficient home server. Usually, I indeed do recycle hardware as good as possible. But for my new NAS/HomeServer I wanted to invest in new hardware. Mostly because I did not have any hardware lying around for this project. Let’s build an efficient low power home server together 😊
In this 4 part article series I’d like to show you how I chose the components for the efficient home server and certainly what the resulting system is like. The resulting efficient home server in my case does need far below 10 W during idle and yet is more than fast enough to run multiple VMs and containers.
In Part 1 I explain what hardware I have chosen, why and how I chose it. The Part 2 (this part) documents the actual build process and power optimizations. The power optimizations are detailed in this Part 3. The last and 4th part explains the main pitfalls I experienced when configuring all the services I wanted.
If you haven’t read Part 1 of this efficient home server series, go check it out now, since it also includes a list of components.
Contents
Building the efficient home server
If you’ve ever built a PC yourself before, there isn’t much new for you in this section. You unbox everything, put everything where it belongs and are more or less done. Still, I’ve tried to capture my impressions of the components compared to other systems I’ve built in the past.
For those of you who never built a system before, this might be a challenging first project. Especially the quite confined space inside the case does offer some challenges. How to route all the cables inside the case? What CPU cooler will fit? Especially with such compact builds, make sure to research everything thoroughly.
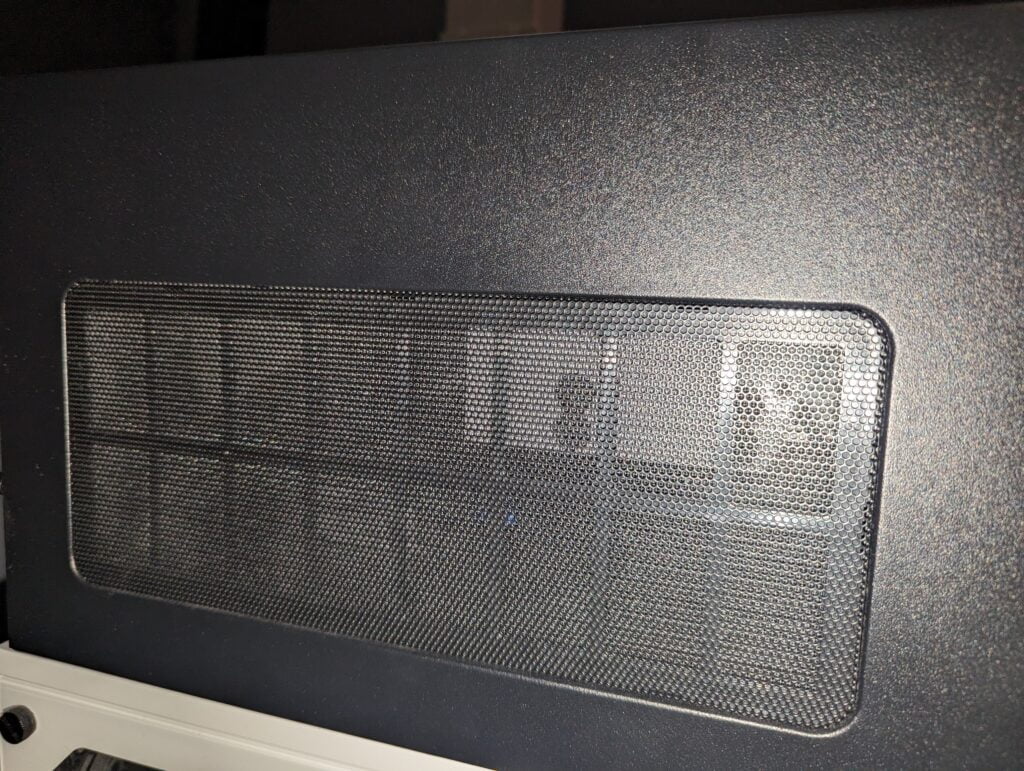
First and foremost, the case certainly is solid and well thought through and has a lot of nice features and touches, which you should definitely expect at this price. All openings used to direct air certainly do have simple filters. However, they are on the coarse side. If your environment is dusty you should indeed consider improving the filters. I have to clean my filters around once every two weeks. After around three months of continuous operation the inside looks ok, but definitely needs a cleaning.
Preparing the case
- Unpack
- Open case
- Remove drive bays
- Remove PSU bracket
- Install mainboard standoff nuts
- Remove fan controller
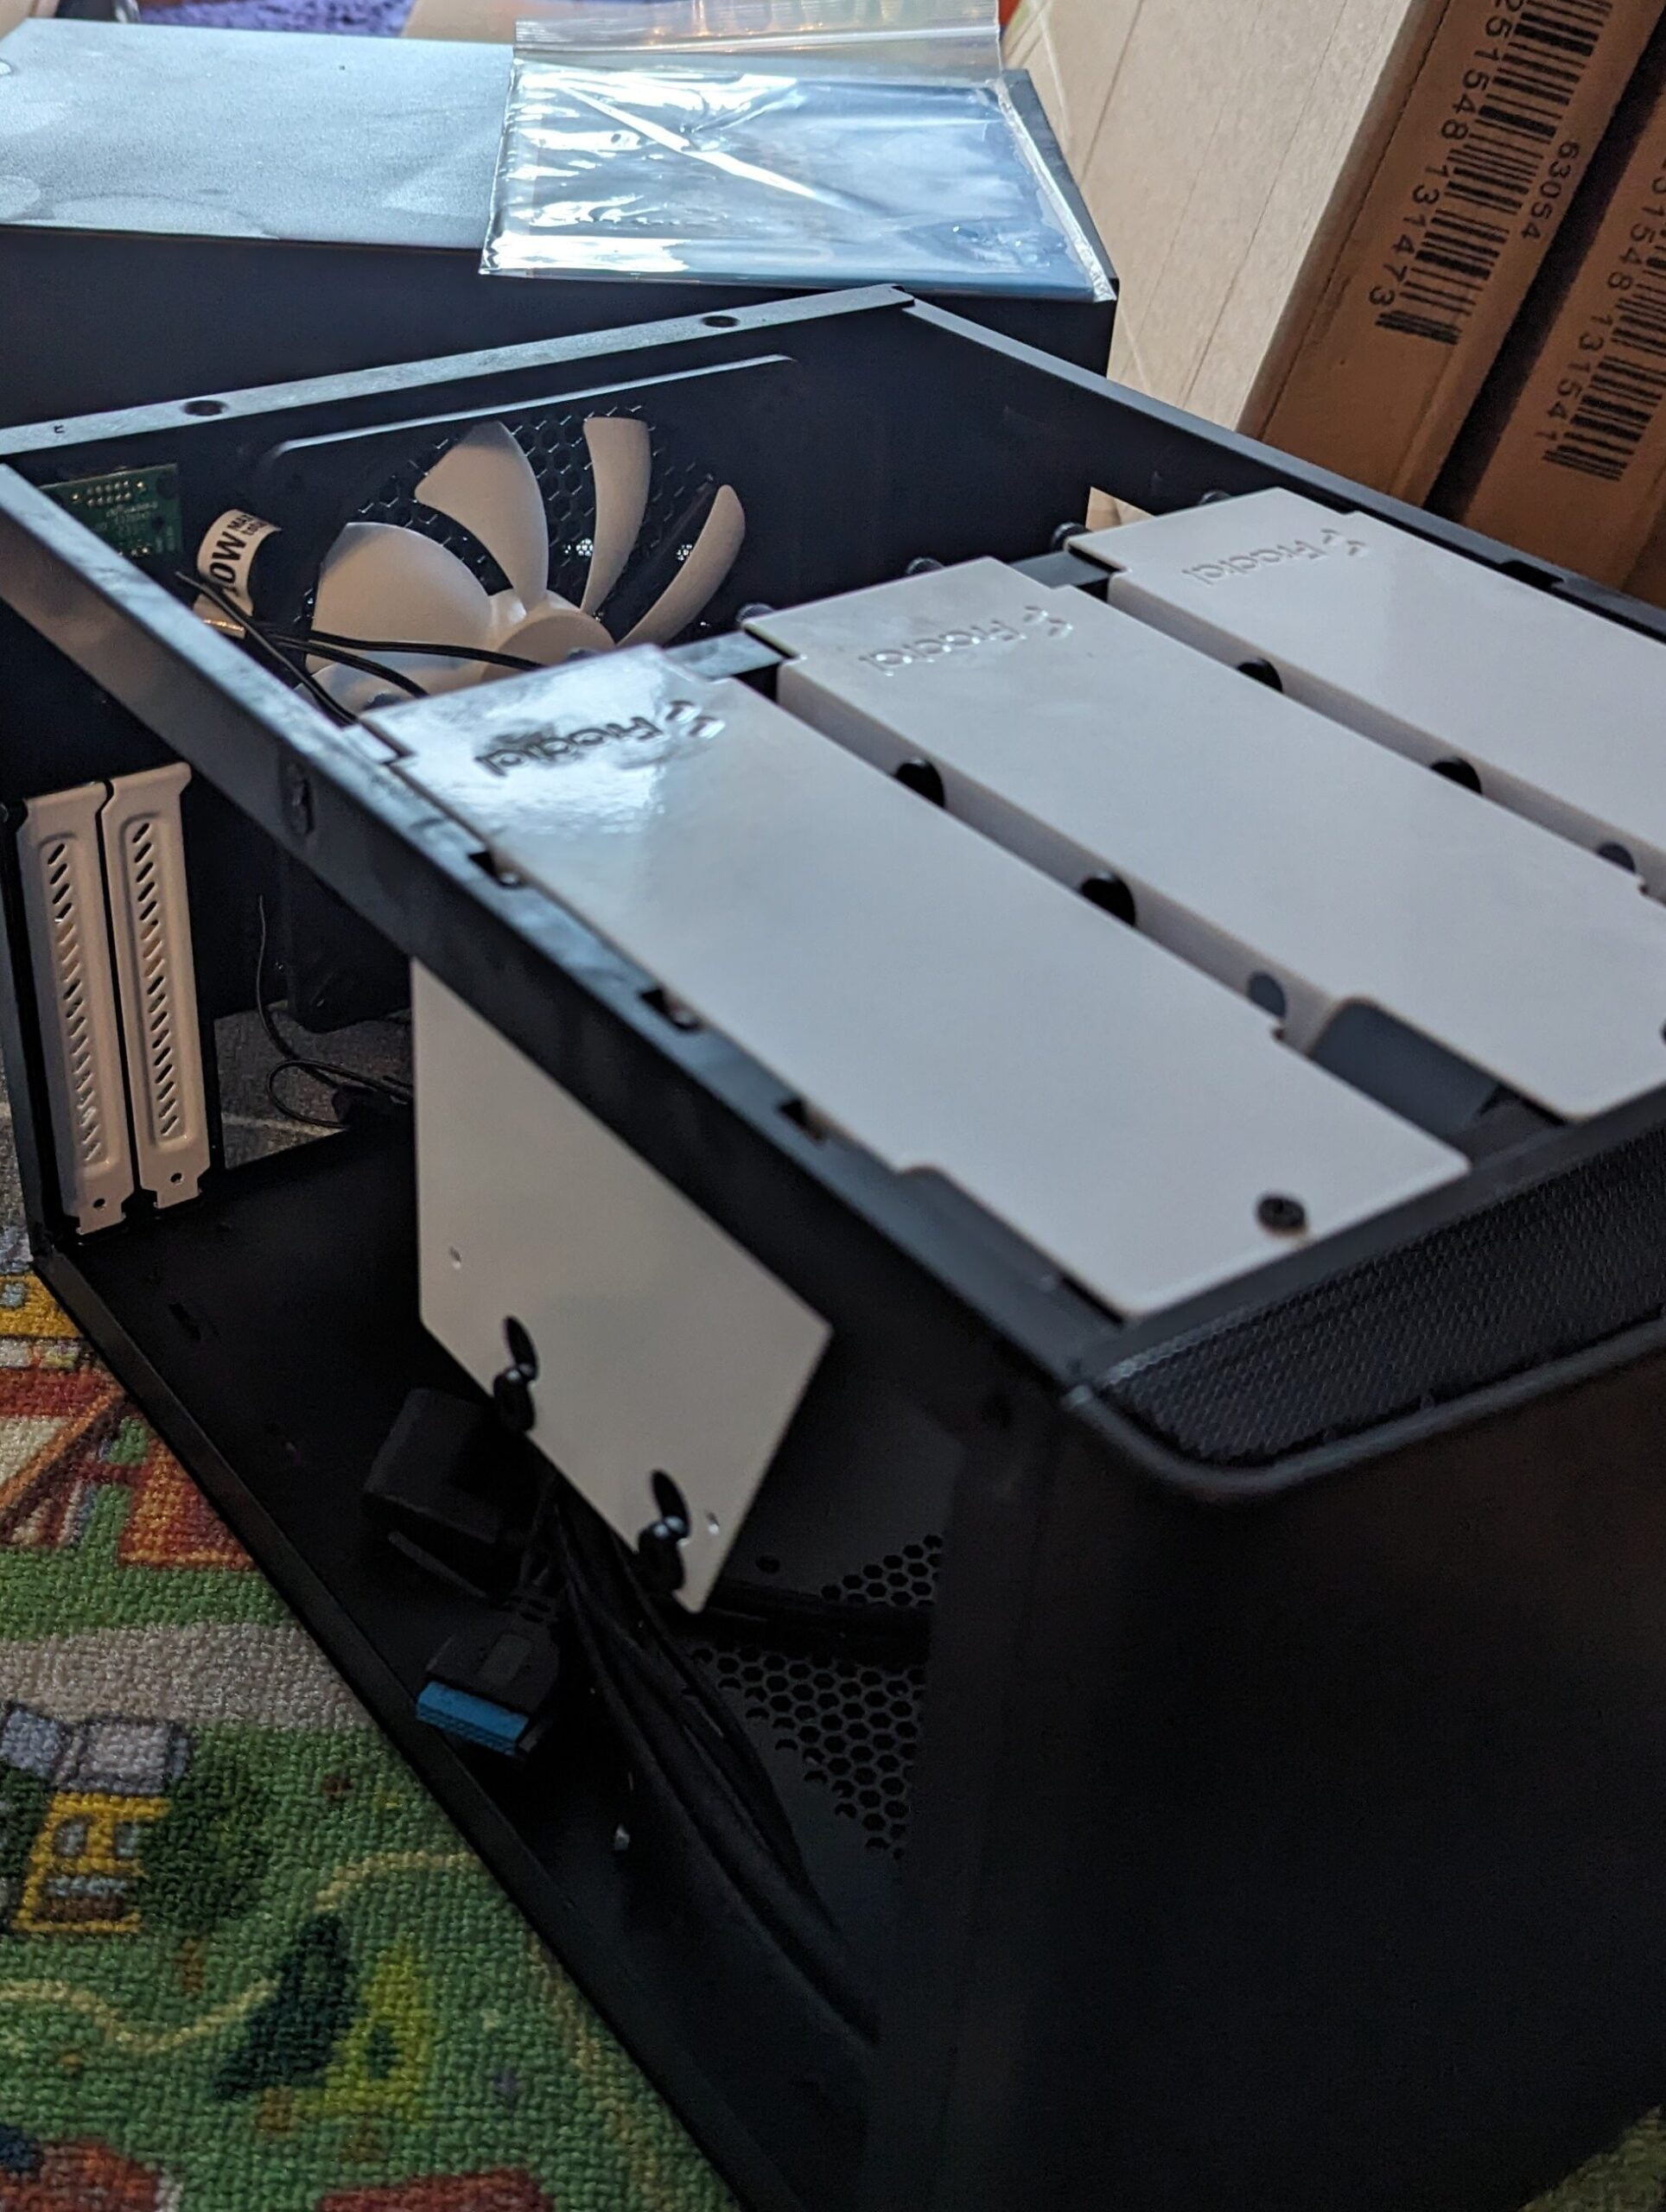
After unboxing the case I also prepare it for the rest of the assembly. In fact, often the cases come fully assembled. Thus, bays for the harddrives are mounted, brackets, fans, shrouds, all these things usually are fixed to where they belong already. But, in most cases you have to remove all of this once, because it gets in the way during assembly. You can assemble everything without taking the case apart, but it’ll just be so much easier if you remove all the innards first. For detailed steps, check the the manual of the Fractal Design Node 304.
Drive bays
First thing in the was is the drive bays, along with the bracket they are screwed onto. You could leave the bracket, but it’s just another four screws and opens up the whole case.
Next up is the PSU’s bracket. You could leave it in there and try to slide the PSU in from the side, but it’s just a lot easier to take it out. And it gives you more working space to put in the mainboard later.
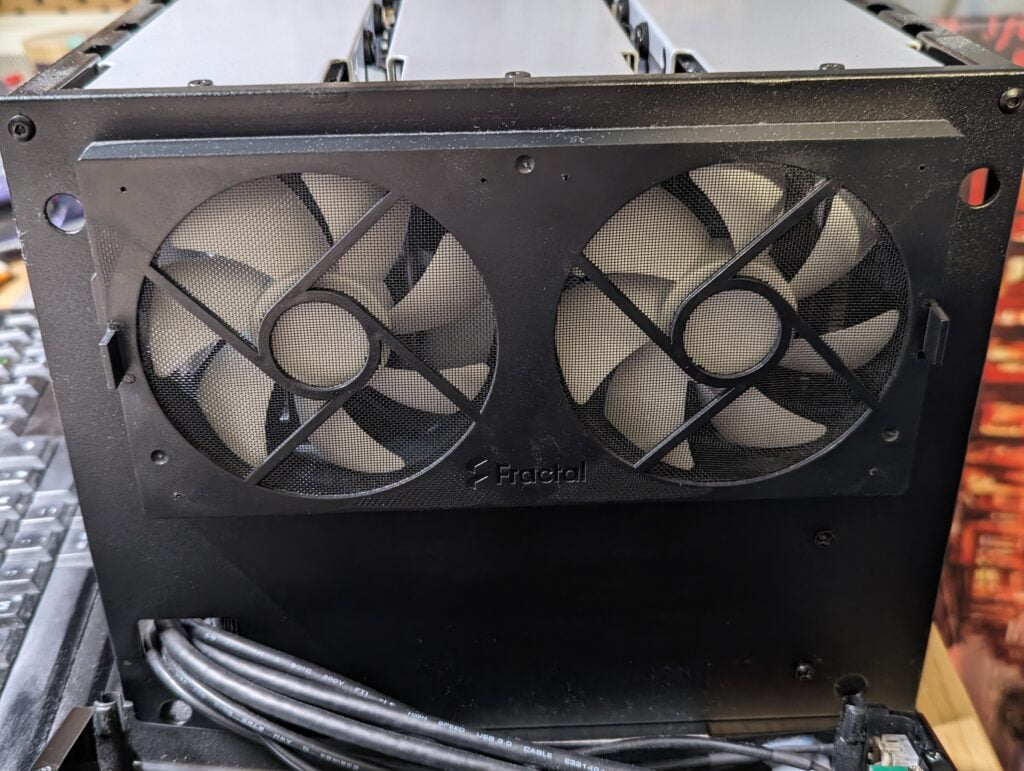
You may remove the rear fan, too. I left it in, because felt like it wasn’t really in my way.
Mainboard standoffs
The most important step, the one you can’t really skip, is installing the mainboard standoff nuts for the mainboard. There are four standoffs. Seeing that often people don’t have pliers or fitting wrenches, fractal design puts an “adapter” in the box. As a result, with the adapter you can fasten the standoffs with a regular Philips screw driver (PH2). A nice little extra.
Fan controller
Last, I did remove the fan speed controller that’s “hidden” above the PCI slot covers. I want the mainboard to control the fan speed later. I did use a 3-to-1 adapter, because the ASUS ROG Strix B760-I Gaming mainboard only has one case fan connector. However, the fan connector should easily be able to drive the three fans of the case. According to Page 1-8 of the manual it’s rated for 1 Ampere. Fans like case fans usually nominally need around 150 mA each, so it should work out.
I/O shield
Usually I would now mount the I/O shield of the mainboard. But, the ASUS ROG Strix B760-I Gaming mainboard’s I/O shild is fixed to the mainboard (you can take it off if you want, but it’s not so straight forward).
Preparing the mainboard
- Unpack
- Seat CPU
- Mount ssd(s)
- Screw on ssd heatsink
- Mount CPU cooler
- Plug in memory
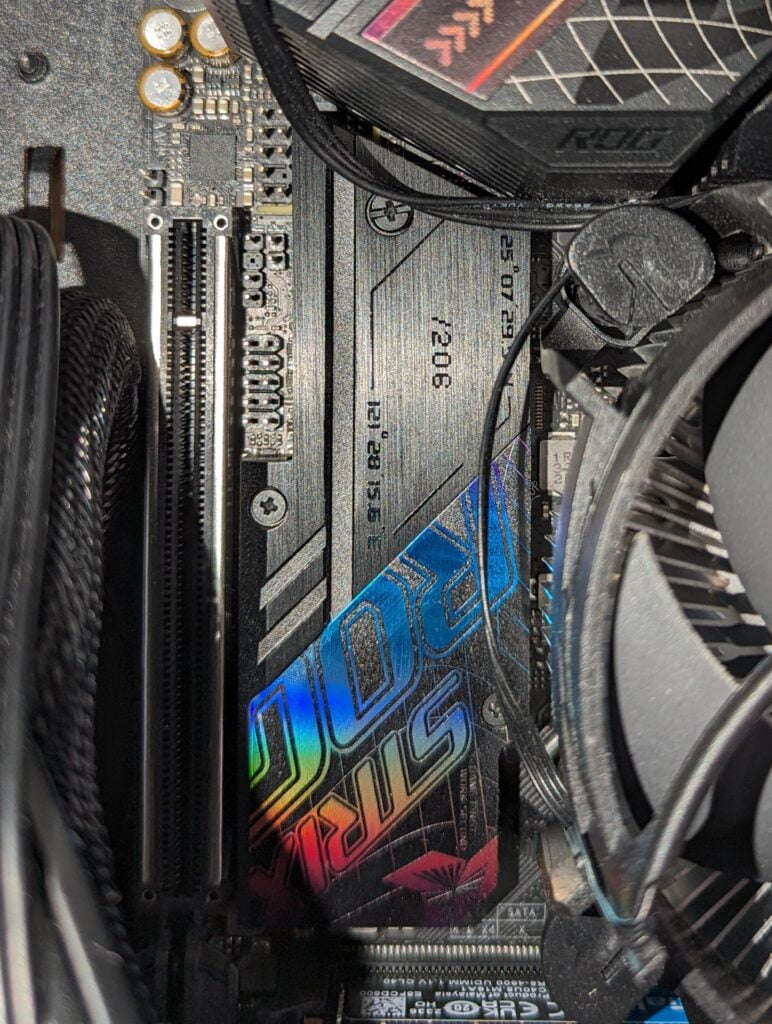
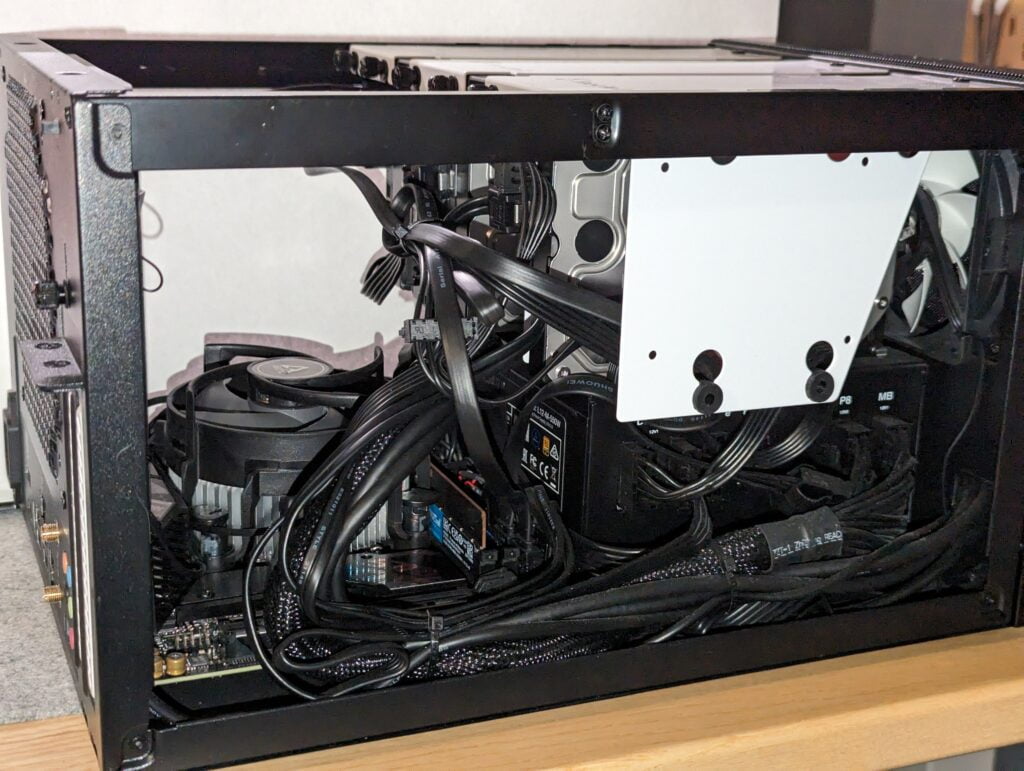
Next up, mainboard prep. You basically want everything that needs to go onto the mainboard on the mainboard before you put it in the case. Why? Look at the photograph of the final system below.
Space inside the final system will be pretty tight. Therefore, make sure to prepare as much outside the case as possible. Especially the second ssd slot of the ASUS ROG Strix B760-I Gaming mainboard, should you want to use it. It’s located on the bottom side of the board. The Fractal Design Node 304 Mini-ITX Case does not allow access to the bottom of the mainboard once it’s installed, so make sure to add that ssd now.
The CPU
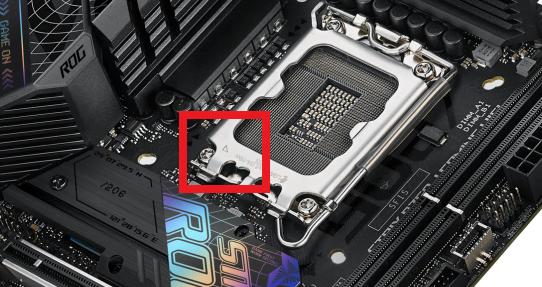
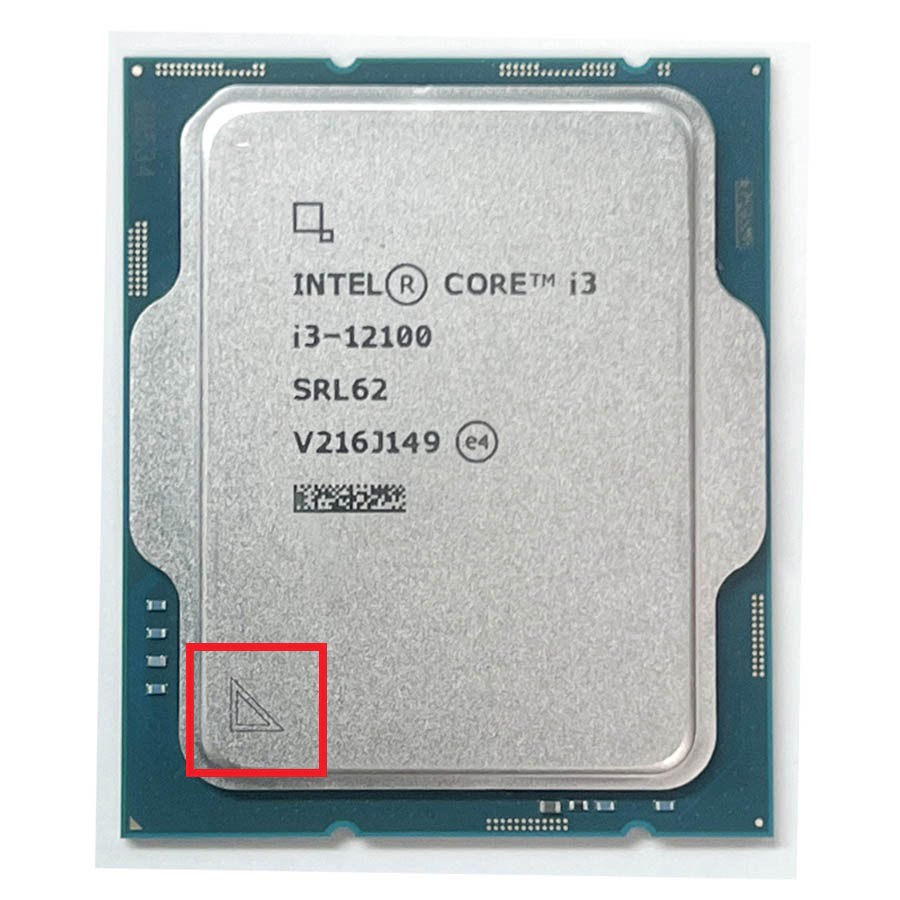
After removing the mainboard from its anti-static bag, I usually start with the CPU. Personally, I don’t like the LGA 1700 socket very much, since I feeld it’s a bit harder to install the CPU than other sockets. Other sockets have markings for the CPU orientation on the socket itself, but most LGA 1700 sockets interestingly don’t. The orientation indicator for the LGA 1700 in contrast usually only is on the plastic cover and the steel cover, not on the socket itself anymore. So take extra care about the orientation of you CPU.
ssd(s)
With the CPU in, before installing the cooler I usually install the m.2 ssd(s). You can still put the board on the table in any orientation, but the CPU socket is covered with something solid. That certainly makes me feel a bit more relaxed 😅 The ASUS ROG Strix B760-I Gaming mainboard does have a handy locking mechanism for 2280 m.2 ssds. Additionally, for 2260 m.2 ssds there’s a separate standoff that needs to be screwed into the mainboard. Despite the clever locking mechanism for the top m2., the bottom ssd is mounted using the “normal” screw standoffs. For a 2242 m.2 you need to use the adapter in the mainboard’s box.
I just had one ssd, so I put it in the top slot, because it’d be running cooler due to the heatsink.
ssd heatsink
The next step is the ssd’s heatsink. The ASUS ROG Strix B760-I Gaming mainboard in fact only comes with one heatsink for the top side m.2 ssd. Above all, make sure to remove the clear film on the thermal pad. Finding the screw holes with the heatsink on top of the ssd was a bit finicky, but eventually it worked out.
CPU cooler
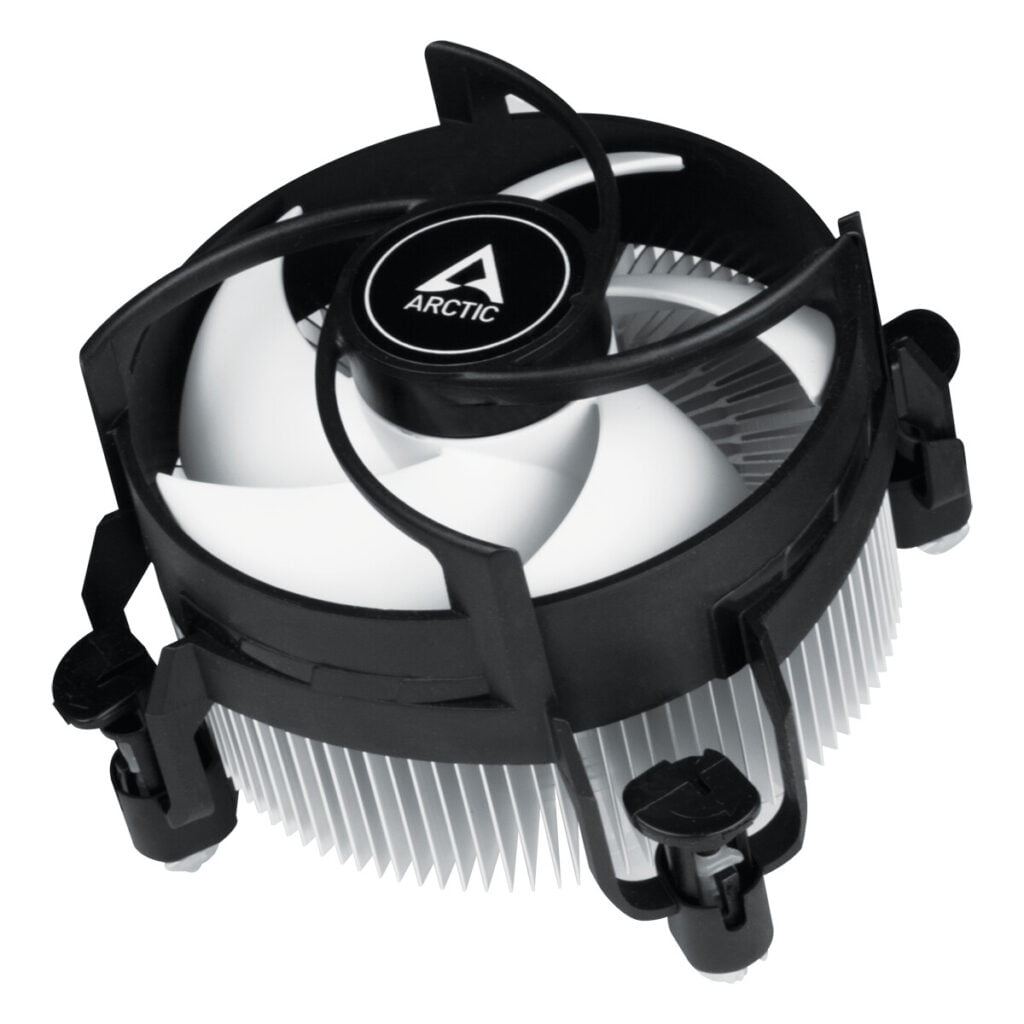
Before plugging in the memory I tend to mount the CPU cooler, since it’s nice to have a bit more space for it. The Arctic Alpine 17 CO is a pretty compact cooler for what it’s capable, so it shouldn’t be that much in the way when I put the mainboard inside the case later. I just like to mount the CPU cooler while the board is outside, because I think it’s easier. Again, above all, make sure to check and remove the film on the thermal pad!
Memory
Last I pop in the memory into its slot(s). I went with a single Crucial DDR5-4800 32 GB stick, just because it was cheap and no no-name memory. The ASUS ROG Strix B760-I Gaming mainboard only has two slots, which indeed can be populated in any order. But, if you have a different mainboard, make sure to check your manual as to which slots to populate first. Also check which memory is compatible with your board. You don’t want to be searching for the reason your PC doesn’t turn on, just to discover that the memory is not compatible with your board days later 😊
NOTE: Due to availability, the RAM in the affiliate links below is not the 5200 MHz version of the memory, which should not impact any of the system’s parameters significantly, if run at 4800 MHz.
Preparing the hdds
- Unpack
- Mount drives to bays
Peparing the hdds is pretty straight forward and quickly done. Put the disks into the bays and screw then on through the noise dampening pads. Also, make sure to leave as much space between the drives as possible. In other words, the more space between the drives, the cooler they run.
Preparing the PSU
- Unpack
- Mount to PSU bracket
Last, the PSU has to be prepared. In this case the PSU bracket bas to be screwed into the mounting holes on the PSU. The bracket has to be used, because the PSU is no conventionally mounted to mounting holes in the case’s outer walls as it usually is done, but rather in the middle of the case. So the PSU is mounted to the bracket, which then is screwed to the case.
Putting the efficient home server together
- Mainboard
- PSU
- hdds
- Cable management
Putting everything inside the case is easy now. First, put in the mainboard, since this is the fiddliest to fit with its I/O shield and the standoffs. After that’s in, put the PSU inside and last you can add the hdds. If you have big hands, try to connect the hdds to the mainboard before putting in the PSU. Otherwise the SATA ports on the mainboard are a bit hard to reach.
Cable management
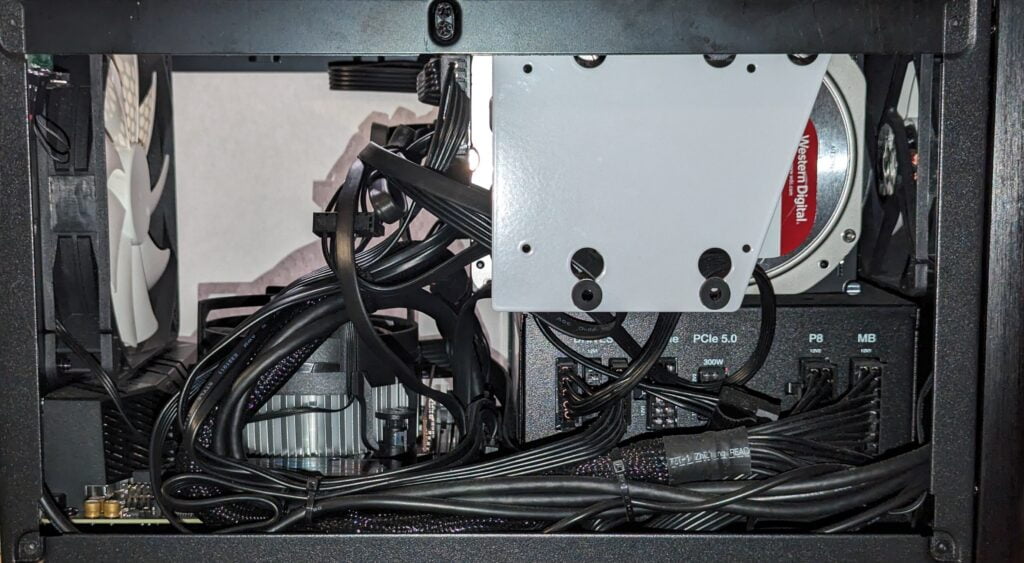
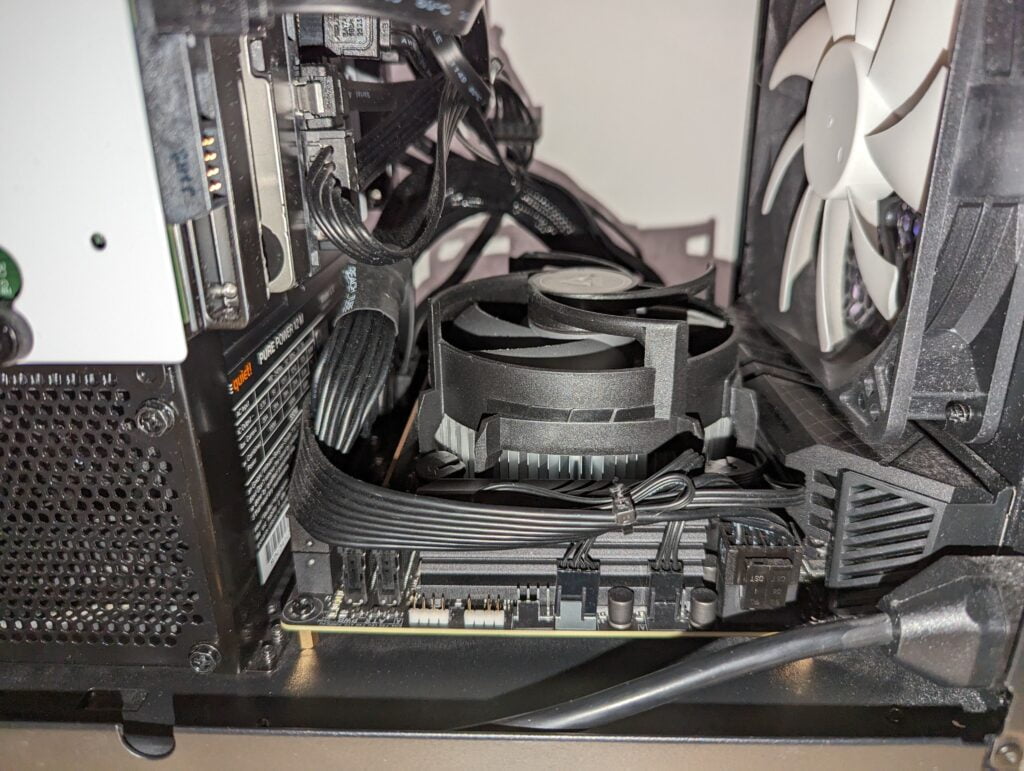
Last, the most critical part has to be done: cable management. Above all, without a decent cable management, even the most efficient home server will be noisy. Not properly routed cables will certainly block air flow within the case. Especially with small cases this will inevitably lead to thermal problems .
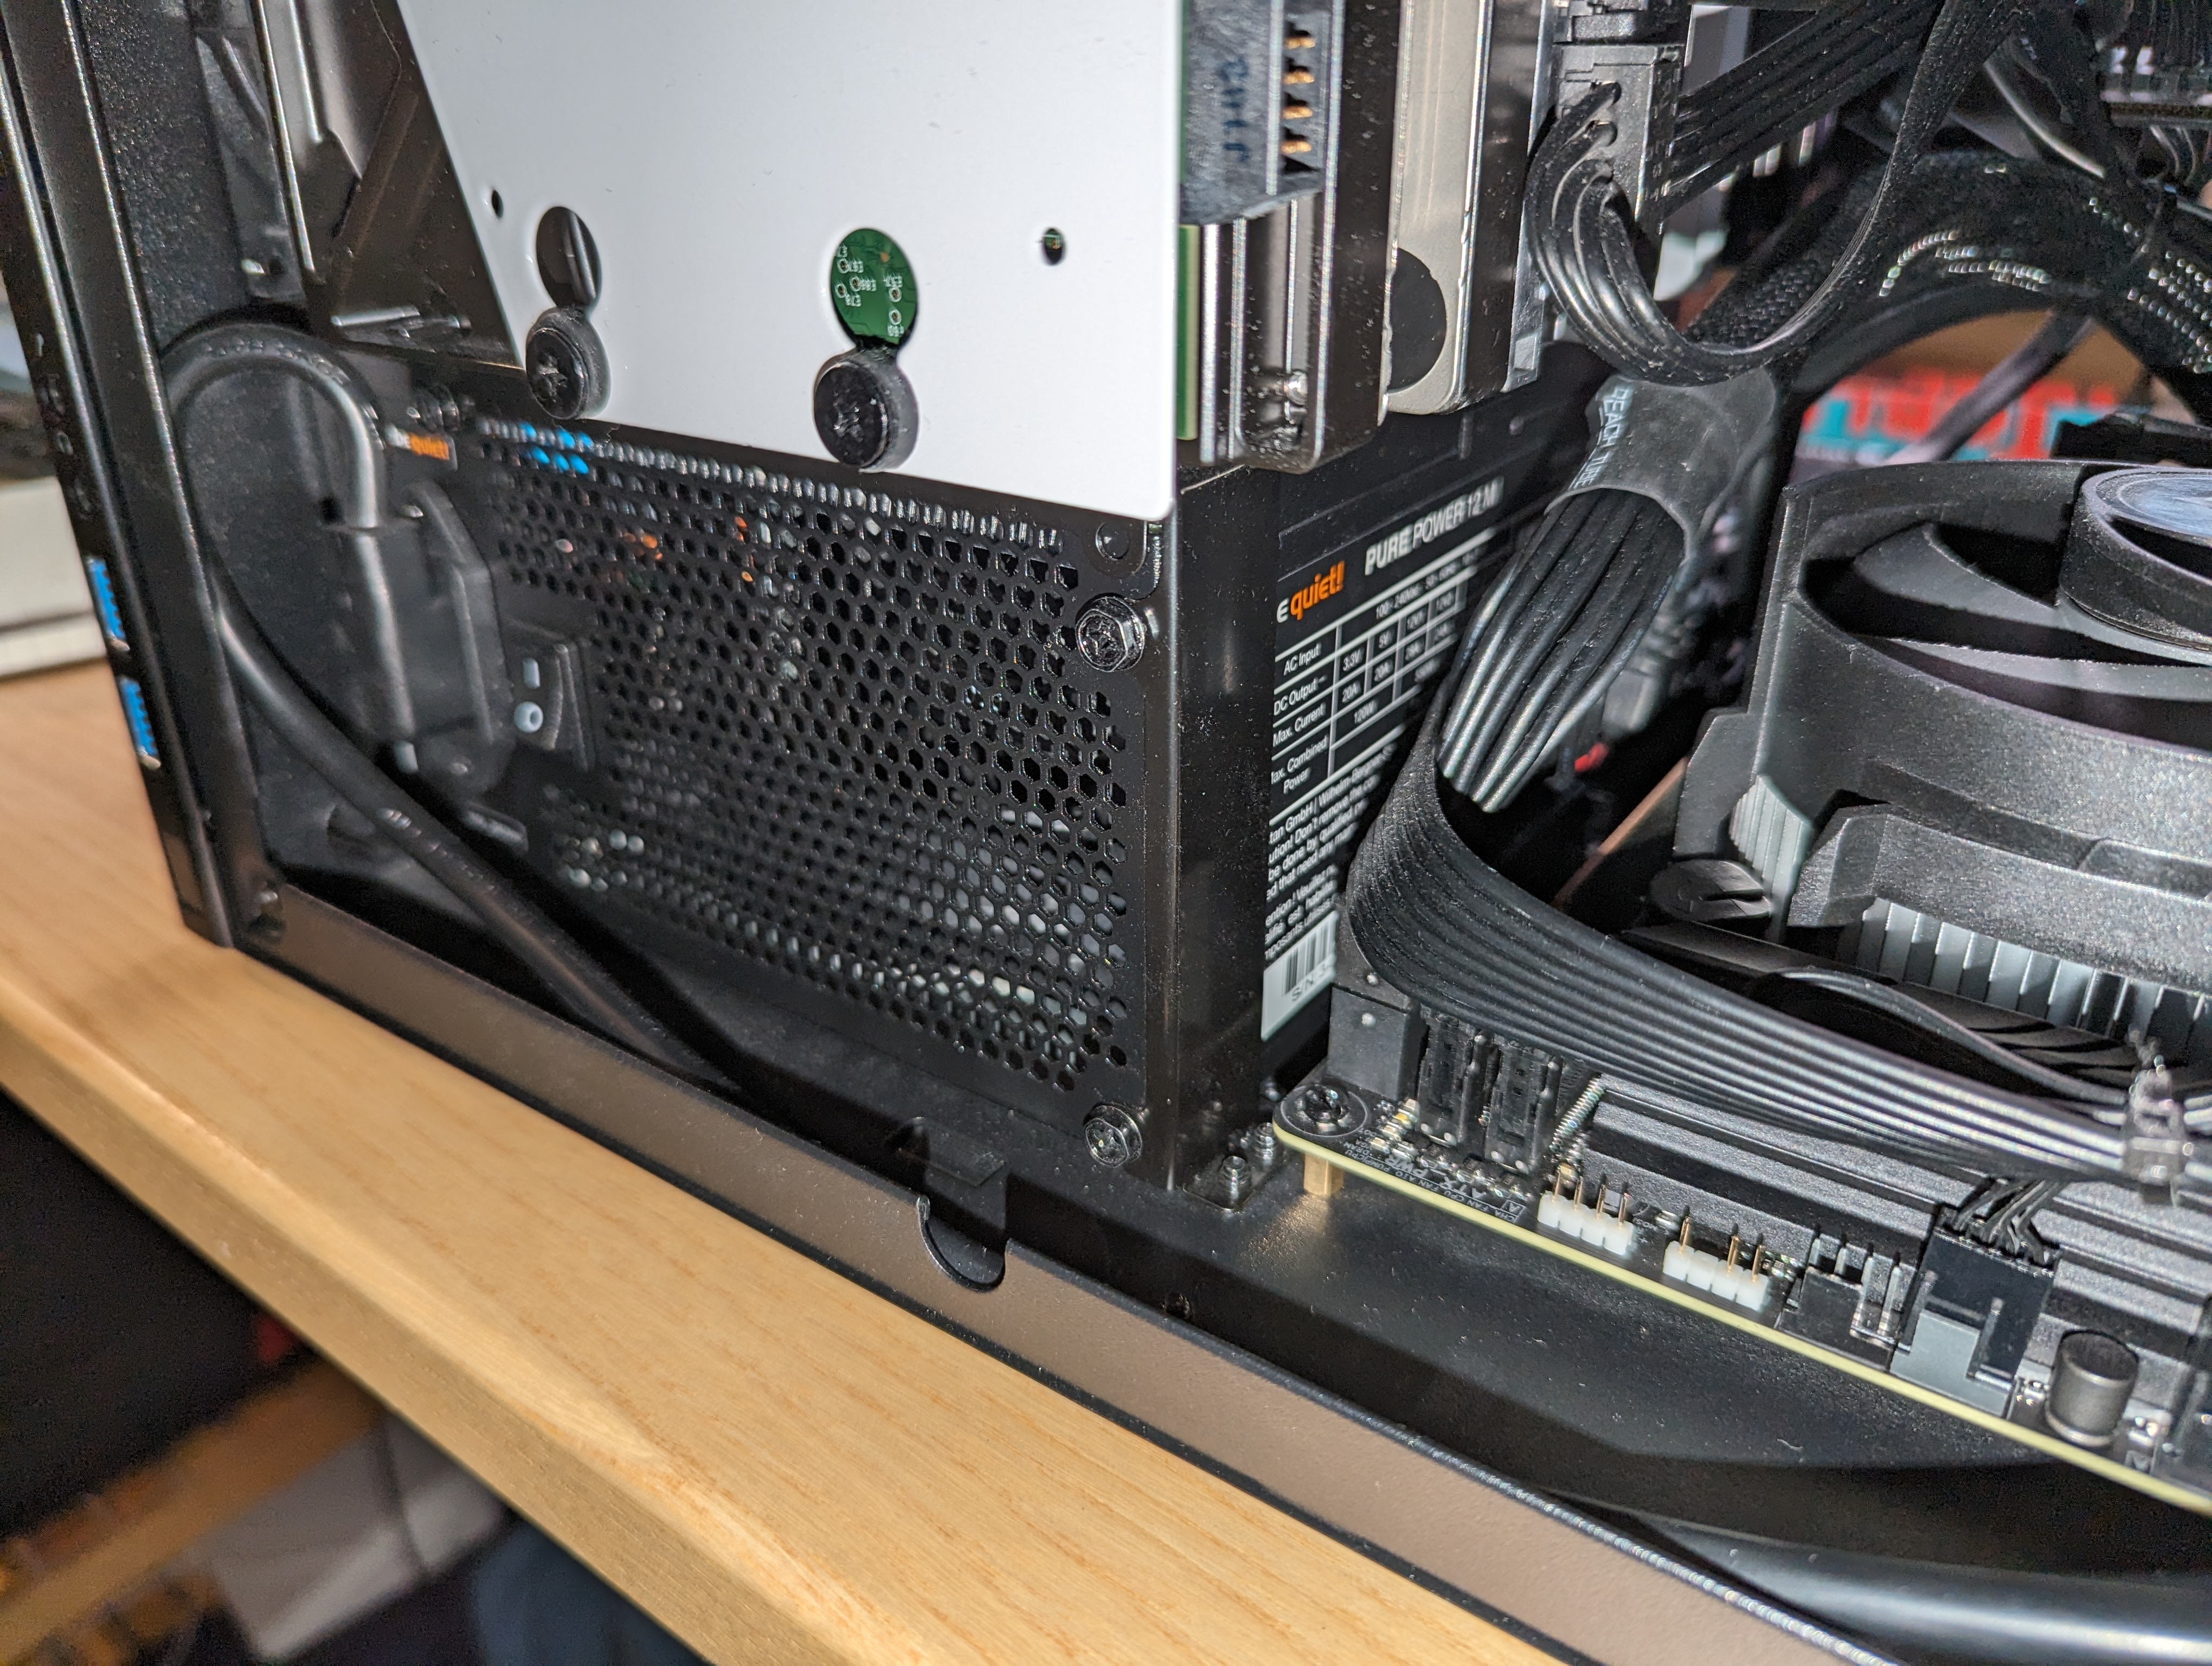
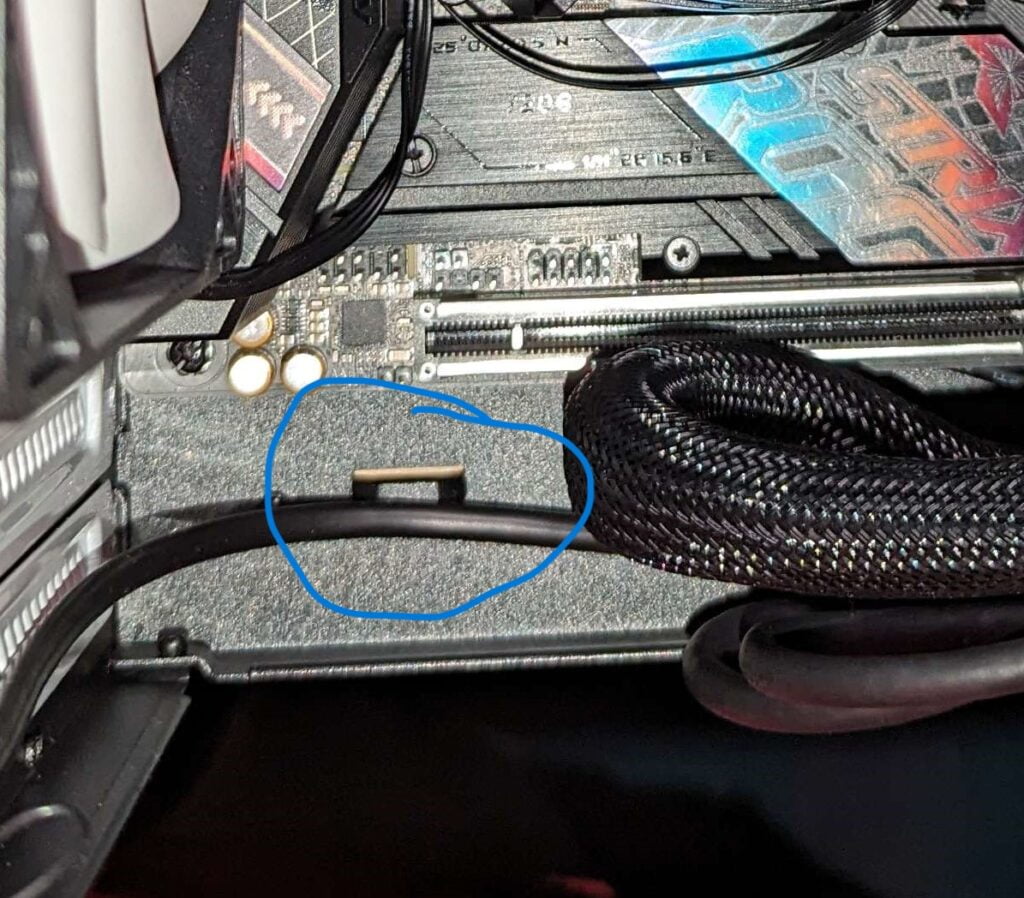
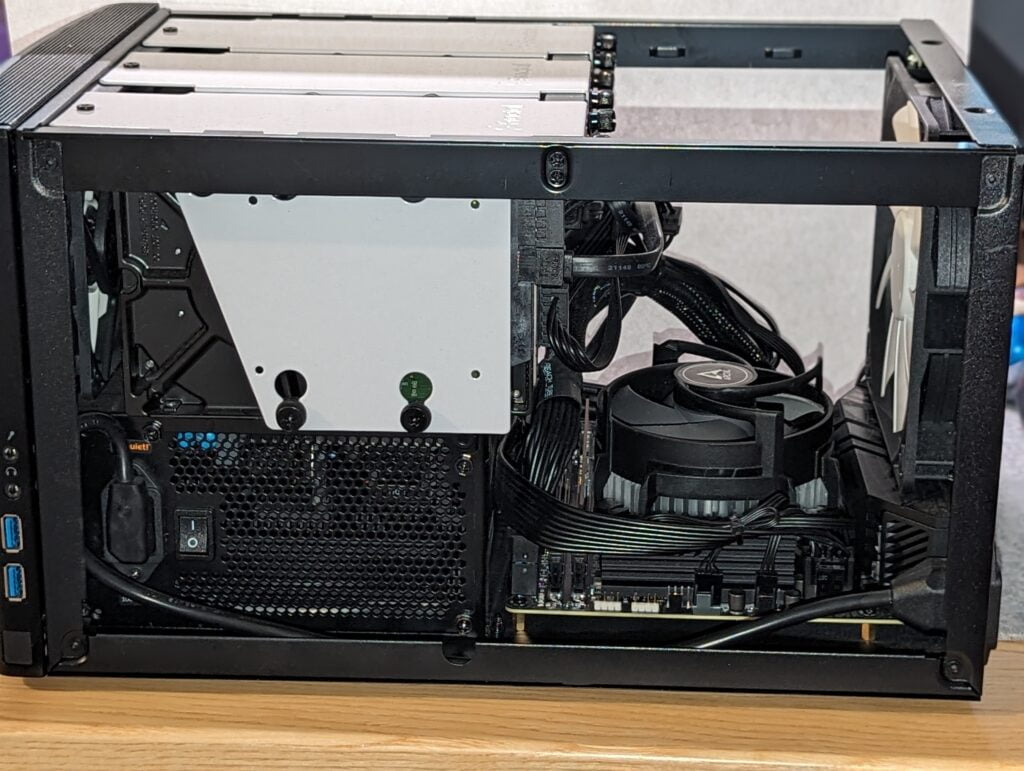
The Fractal Design Node 304 in fact does offer some “lugs” for routing cables with zip ties. The modular design of the be quiet! Pure Power 12 M 550 W also helps to keep the wire count as low as possible inside the case. Yet, with 4+ hdds, a mainboard, front usb, fans, there are certainly lots of wires running through the case.
Additionally, the very limited space is challenging. As you might see on the pictures, certainly the easiest way to keep the wires tidy inside this machine was to use the space between the case’s side panel and the PSU. That’s also where the lugs are. The front USB and front fan wires also run through there. Finally, I’ve included a few shots I’ve taken of the cable management.
Conclusion
That’s it for Part 2 of the efficient home server build, the Build. As I mentioned, if you’ve built a PC before there likely wasn’t much new here. I still hope that some of you might have discovered one or two interesting details. The cable management in this build was definitely different to what I had done before, due to the confined space and the sheer amount of wires I still had to route in there.
Up next is Part 3 is the power optimization.
Amazon Links for the efficient home server
If you enjoyed the article and would like to say thank you (or build the same system), please consider using one of the Amazon affiliate links from the table below. At this point I still have to manually handle the Amazon Affiliate links, so please choose the location closest to you from the table. As amazon associate I am getting a small share if you buy the products clicking on the links. Thank you 😊
Disclosure: The links below are all Amazon Affiliate links. For details, please check my affiliate disclosure.
| Amazon DE | Amazon UK | Amazon US | |
|---|---|---|---|
| Intel Core i3 12100 | https://amzn.to/3zq6pPN | https://amzn.to/3JdZuuv | https://amzn.to/443gME3 |
| Arctic Alpine 17 CO | https://amzn.to/4glM8vz | https://amzn.to/3UeDh5G | https://amzn.to/4cR65Zf |
| ASUS ROG Strix B760-I Gaming | https://amzn.to/4daVwiP | https://amzn.to/49H9VBC | https://amzn.to/3TXFKA0 |
| Crucial DDR5-5200 32 GB | https://amzn.to/3Bggi2V | https://amzn.to/4e0hiqy | https://amzn.to/4e5ydIa |
| Fractal Design Node 304 Mini-ITX Case | https://amzn.to/3MKLABP | https://amzn.to/49xHOof | https://amzn.to/3PZIqfp |
| be quiet! Pure Power 12 M 550 W | https://amzn.to/3XKzdf3 | https://amzn.to/4aV8Rep | https://amzn.to/43XUbsy |
| Samsung 970 Evo Plus 250 GB | https://amzn.to/4glMe6p | https://amzn.to/49EEGGZ | https://amzn.to/43XdceH |